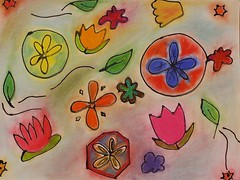
Aims: *To get students to think creativity and connect a shape to a poem that relates to that shape
*To bring language arts and art together in your classroom
Materials: Paper, pencil, eraser, crayons, markers, watercolors, etc.
Procedure: In a unit on poetry, have students write a simple poem on a topic you assign or of their choice. It could be about an animal or place or season. Depending on their level, you could get into rhyming or ABAB poetry, if you wish. Once the poems are written, which is really the language arts section of this project, have them sketch out an image that relates to the poem. The words can fit inside the shape or they can be written around the edge of the shape. Tell them to make it colorful and beautiful.
Reflection: Have the students read their poems and display them to each other.
Variation: Have students make a vertical poem by writing their name or other word down in a row. They then make up a poem using each letter as the first letter of each word in each line. They can make these poems quite artistic by adding color, metallic details, fancy script, etc.
Monday, September 27, 2010
Monday, September 20, 2010
AR 271--Shoebox Gradations
This is a good way to introduce the idea of gradations to older students and help them understand the color wheel better. For younger students, you could concentrate on how to use the brush, basic painting methods and so on.
Aims: To create a painted storage box
To learn about gradations, including tinting, shading and complimentary colors
To understand paint set up, changing colors and general painting techniques
Motivation: Show or draw your students a color wheel and go over the concept of primary, secondary, tertiary and complimentary colors. Mention that they are going to work with tints and shades as well in your introduction.
Vocabulary: color wheel, primary color, secondary color, complimentary colors, gradation, tint, shade
Materials: cardboard shoeboxes, sandpaper, white tempera paint or gesso, pencil, eraser, brushes of various sizes (not too big), tempera paint (primaries, secondaries, black, white, magenta and turquoise), water cans (used coffee cans are best, snap lids on bottom to prevent rust) filled up almost to top, mixing trays, dampened paper towels. Optional: medium or Mod Podge
Procedure: The first part can be done at a different time from the painting, Students will paint their boxes white and let them dry. If they are shiny, they need to be sanded first to give them a tooth. Gesso makes the best covering, but costs more than paint. Next have them work out designs on the boxes that will be filled in with gradations. You might want them to work on a separate piece of paper first. It could be their name in bubble letters, abstract designs, etc.
When you are ready to add color, give a demonstration around a table where all students have a clear view. (I used to have a oval tape on the floor and had the students stand behind it, with the taller ones in back. If they creep forward, they can easily move back when they see where their feet are.)
Set up your colors in a styrofoam egg carton or tray. I put dampened small sponges or paper towels in the lid sections which act as "insurance policies." Each student shares a water can and paints with another student. Everyone gets their own brushes and mixing tray. Put names on the bottom of the boxes first. Show what happens when you add white to a color (tinting), Next, show them what happens when you add black (shading). Lastly, show them what happens when the complimentary of a color is slowly added. Explain that they will use all three on their box (unless you want to limit to just a tint, say). When changing colors, demonstrate the importance of making sure the paint is off the brush by wiping on the paper towels. When washing the brushes, students must look at what they're doing, swish the brush along the bottom of the can, and not "drum" to get the water off. Tickle, instead.
When completed you can varnish them with acrylic medium or Mod Podge for a glossy look.
Reflection: Share the work, as always.
Thursday, April 29, 2010


Monday, April 19, 2010
272-Monoprint
Monoprints (K- adult)
Whether you use ink or tempera, this process is quick and fun.
Aim: •To explore direct painting on plexiglas and make a print of it
Materials & Tools:
Plexiglas plates (tape edges if sharp)
water-based printmaking inks or tempera
mixing trays
a variety of brushes, scrapers, cardboard combs, etc
white paper (not too thick)
newspaper to cover tables
Procedure:
Have a theme for your project and motivate your students with photos, examples, discussion, etc.
Be sure to demonstrate the process with your students gathered around. White paper goes underneath the plastic plate (so you can see better) and that way you have it ready for printing. If you are copying an image you may place that under the plate on top of the white paper for tracing.
Brush or roll your color on your plate. Don’t make the ink too thick or too thin and work very quickly. The ink or paint begins to dry immediately. Lay the paper on top and rub quickly. Pull off your print. The whole process should take no more than 2 minutes.
Remember this is a backwards process.
Wash off the plate, dry it and make another print or give the plate to someone else.
When dry, you may frame your print and decorate a border with craypas or some other material.
Reflection:
Always share your students’ work and hang up, if possible.
Tuesday, March 30, 2010
Sunday, February 7, 2010
AR 272--Shoebox Collage
This is an easy lesson you can use at all grade levels and in many circumstances. (Think Mother's Day Jewelry Box, Father's Day All-Purpose Box, Autobiographical Paperweights, etc.)
Aims: To have students work on their cutting skills
To explore collage technique
To learn proper gluing methods
Materials: cardboard shoebox, photos, printed downloads, magazines, wrapping paper, etc., glue stick or white glue, a glue brush for white glue, a small glue container, good scissors (I like the small orange-handled Fiskars). Optional: Mod Podge (for varnishing).
Vocabulary: collage (teach the difference between collage and college)
overlapping
edge
composition
Motivation: Talk about the various possibilities your students have in this project. They might choose a theme (animals, my life, my family, a surrealist landcape etc.)
Procedure: Demonstrate proper cutting (the paper moves, not the scissors for the most part). Next show how your students can plan, by cutting out many shapes and laying them down in different ways, before gluing them down. Gluing needs to be done only around the edges. Make sure the students proceed carefully so the shapes don't wrinkle. Cutting around photos rather than gluing on the rectangled, uncut photos looks better.
Reflection: Share the work and display, if possible.
Optional: Coat the finished product with Mod Podge, which makes a glossy coating. Photo collages may not need this step. Try some Mod Podge on a corner of a photo to see if it looks nice or not before coating your box.
Subscribe to:
Comments (Atom)